Whether you use a 1000-litre IBC tank, a 5000L Kentank, or an underground concrete tank, cleaning and regular maintenance are crucial to ensure your water stays safe, fresh, and usable especially in Kenya, where stored water often supplements or replaces piped supply.
This guide outlines step-by-step cleaning procedures, required tools, and simple maintenance schedules to protect your tank and your health.
1. Why Tank Cleaning and Maintenance Matter
Water tanks especially those used for rainwater harvesting or intermittent municipal supply are prone to:
- Sediment build-up from dirt and rust
- Algae growth, especially in clear or unshaded plastic tanks
- Bacterial contamination in stagnant water
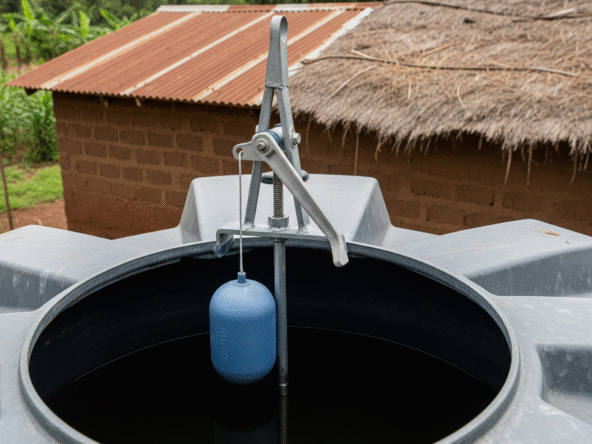
- Mosquito breeding, particularly in tanks without tight covers
These can cause unpleasant smells, clogged pipes, and serious health risks. For prevention at the collection point, see Rainwater Harvesting in Kenya.
2. Tools and Materials for Tank Cleaning
You’ll need the following for an effective tank cleanout:
- Long-handled scrubbing brush
- Dish soap or natural cleaner like baking soda
- Water hose (or pressure washer if available)
- Pump for draining large tanks
- Bucket and gloves
- Ladder (for tall or underground tanks)
- Optional: chlorine bleach (1 tbsp per 1000L) for disinfection
If you’re working with cube-shaped IBC tanks, follow cleaning tips from IBC Tank Use in Kenyan Homes
3. How to Clean a Water Tank: Step-by-Step
Step 1: Drain the Tank Completely
Use gravity or a pump to empty the tank. Avoid contaminating gardens if you plan to disinfect with bleach.
Step 2: Scrub Interior Walls and Floor
Using your brush and soapy water, scrub every surface—especially corners, the base, and under the inlet and outlet areas.
Step 3: Rinse Thoroughly
Rinse at least twice using clean water and flush out all soap and debris.
Step 4: Disinfect (Optional)
Add 1 tablespoon of bleach per 1000 litres of water. Let it sit for an hour, then drain and rinse.
Step 5: Inspect for Damage
Look for cracks, algae stains, leaky valves, and brittle gaskets. Replace or seal where needed.
Step 6: Seal and Secure the Tank
Ensure the lid is mosquito-proof, fittings are tight, and inlet pipes have debris screens installed.
4. Routine Tank Maintenance Schedule
| Task | Frequency | Notes |
|---|---|---|
| Full cleaning | Every 4–6 months | Especially before and after the rainy season |
| Lid and mosquito net check | Monthly | Prevent larvae and debris from entering |
| Overflow pipe check | Monthly | Ensure no clogs or backflow risks |
| Cracks and algae inspection | Quarterly | Patch cracks; paint tanks black to minimize algae |
| Plumbing connections review | Every 6 months | Replace aging or leaking fittings |
Looking for durable, UV-resistant tanks? Explore Top Water Tank Brands in Kenya
5. Prevention Tips Between Cleanings
To reduce cleaning frequency and improve water quality:
- Install first-flush diverters for rain-fed tanks
- Use black plastic tanks or UV-blocking paint
- Place tanks on concrete or raised platforms
- Cover all openings with fine mesh or nets
- Regularly monitor overflow points and screens
For setup elevation tips, refer to DIY Tank Stand Construction
6. When to Hire a Professional Tank Cleaner
DIY cleaning works for most tanks under 5000 litres. However, consider professional help if you have:
- Underground or large concrete tanks
- Multi-tank systems with hidden pipes
- High-rise water towers or steel platforms
- Tanks exposed to contaminated water or visible mold
Professionals can also inspect valves, pressure points, and supply lines during the cleaning process.
Keeping your household water tanks clean ensures a steady flow of safe, odor-free water. From rain-fed IBC containers to underground cisterns, regular cleaning every 4–6 months will improve water hygiene, protect your plumbing, and extend the lifespan of your tank.
Explore More on Water Storage and Setup: